Replace Your Zorin OS Installation
Overwrite your current copy of Zorin OS with a new clean installation.
What you need
- A computer capable of running the version of Zorin OS you’ll be installing. View System Requirements ›
- One USB flash drive with enough capacity for your Zorin OS edition:
- Core and Lite: 4 GB
- Pro/Pro Lite and Education: 16 GB
- An external drive or cloud storage to back up your important files.
Download your new Zorin OS .iso file
If you haven’t already downloaded your new copy of Zorin OS, you will need to get it from our website to proceed.
Please keep the downloaded Zorin OS .iso file on your computer while following the next steps. You don’t need to copy & paste it to any external devices, you can simply keep it in your computer’s “Downloads” folder.
Back up your data
Please back up the important files on your computer to an external drive or cloud storage service. After installing your new copy of Zorin OS, you will be able to restore this data to your new installation.
View how to back up your files ›
Alternatively, if you’re unable to boot into your existing Zorin OS installation, you should still be able to access the files on its partition to back them up to an external drive before starting the new installation process:
- Please follow the steps below to create a bootable USB Install Drive for your new copy of Zorin OS and boot your computer from this USB Install Drive.
- When you reach the desktop after selecting the “Try Zorin OS” option.
- Open the Files app.
- Select the “Other Locations” item in the left sidebar.
- Click on the partition for your existing installation of Zorin OS.
- Browse and select the important files & documents you wish to back up to an external drive.
- Copy your important files to the external drive manually ›
Create a bootable USB Install Drive
You will need to write the Zorin OS .iso file to your USB flash drive using an app called balenaEtcher. The computer that you use to do this can be different from the computer you plan to install Zorin OS onto.
- Plug the USB flash drive into your computer.
- Double-click on the downloaded balenaEtcher file to launch the app. This file should be in your computer’s “Downloads” folder.
- On Linux. If you downloaded a .zip file for balenaEtcher, you need to right-click on this file in the Files app and select “Extract Here”. Afterwards, navigate into the newly extracted folder and double-click on the first file named “balena-etcher” to launch the app.
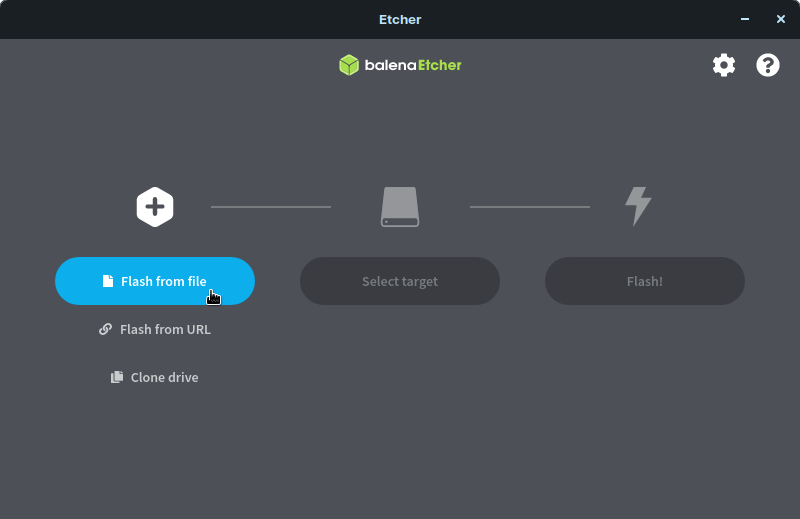
- Press “Flash from file” and select the downloaded Zorin OS .iso file on your computer. This file should be in your computer’s “Downloads” folder.

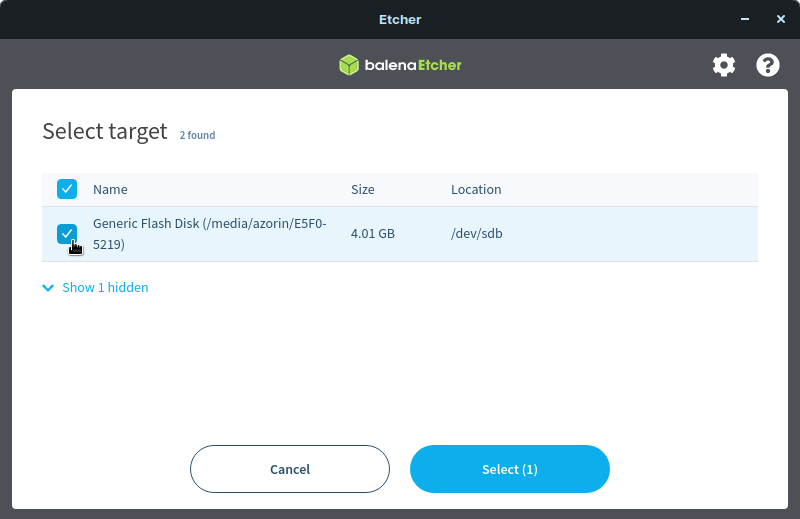
- Press “Select target” and choose the correct USB flash drive in the list.

- Press “Flash!” to begin writing Zorin OS to the USB flash drive.

- After a few minutes, the USB flash drive will be ready for booting into Zorin OS.

Boot from the USB Install Drive
To install your new copy of Zorin OS, you must boot your computer from the USB Install Drive.
Switch off the computer you want to install Zorin OS onto. Make sure it’s completely powered off, and not in sleep or hibernate mode.
Plug the Zorin OS USB Install Drive into the computer.
Switch on the computer. Immediately at start-up, repeatedly press the designated key to open the Boot Device Menu.
- On a PC. This key should be indicated on the screen at start-up or in your computer’s manual. If you’re unsure which key to press, it is usually either Esc, Delete, F2, F12, or another function key.
- On a Mac. Press and hold the ⌥ Option key at start-up. If you’re using a wireless keyboard, you may need to plug in a USB keyboard instead to be able to select the boot device.
At the Boot Device Menu, use the arrow keys to highlight the option which mentions “USB”, “EFI”, or the flash drive manufacturer’s name. Press Enter to boot from the Install Drive.
- On a Mac. Sometimes the Install Drive might be incorrectly identified as “Windows”, which is normal.
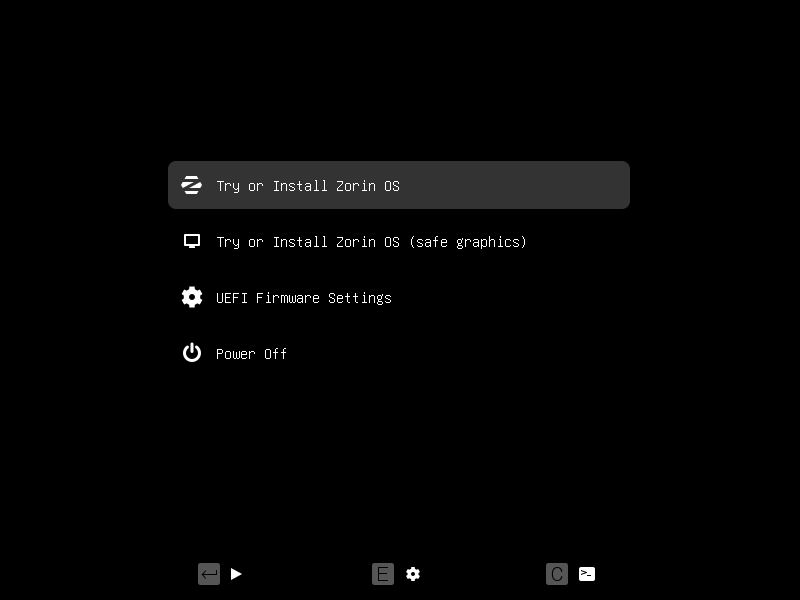
Select the “Try or Install Zorin OS” option in the Zorin OS boot selection menu using the Enter key.
- If your computer has a modern NVIDIA graphics card (produced after 2013). You can select the “Try or Install Zorin OS (modern NVIDIA drivers)” option using the ↓ ↑ keys. Press Enter to boot and install with the official NVIDIA proprietary graphics drivers. Please note that you may need to first disable your computer’s Secure Boot feature to enable the NVIDIA drivers fully.

While booting, Zorin OS will check the USB Install Drive to ensure there aren’t any defects. We recommend that you do not skip this check the first time you use the USB Install Drive. It helps prevent issues while installing Zorin OS to your computer.
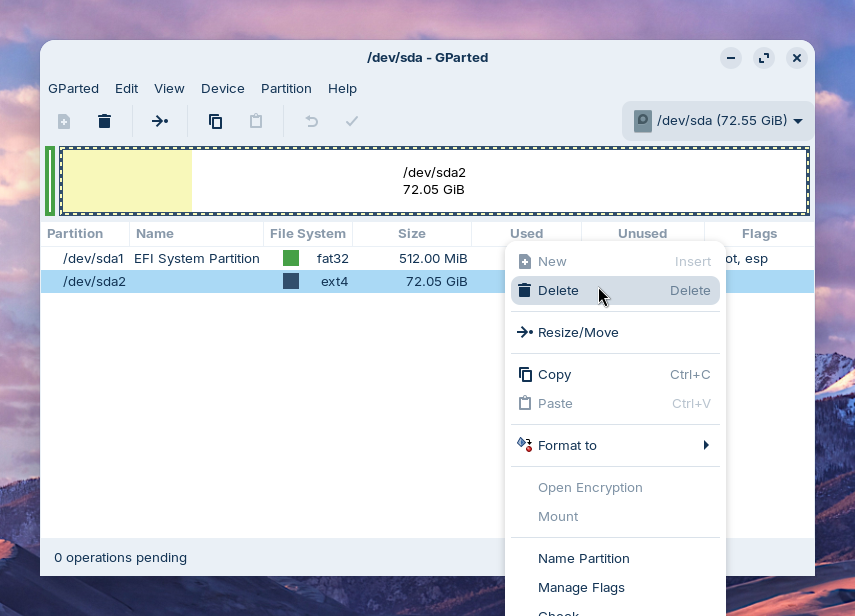
Prepare the drive partition
If you have multiple operating systems installed on your computer’s drive (dual boot), you must free the space which is currently reserved for your current installation of Zorin OS.
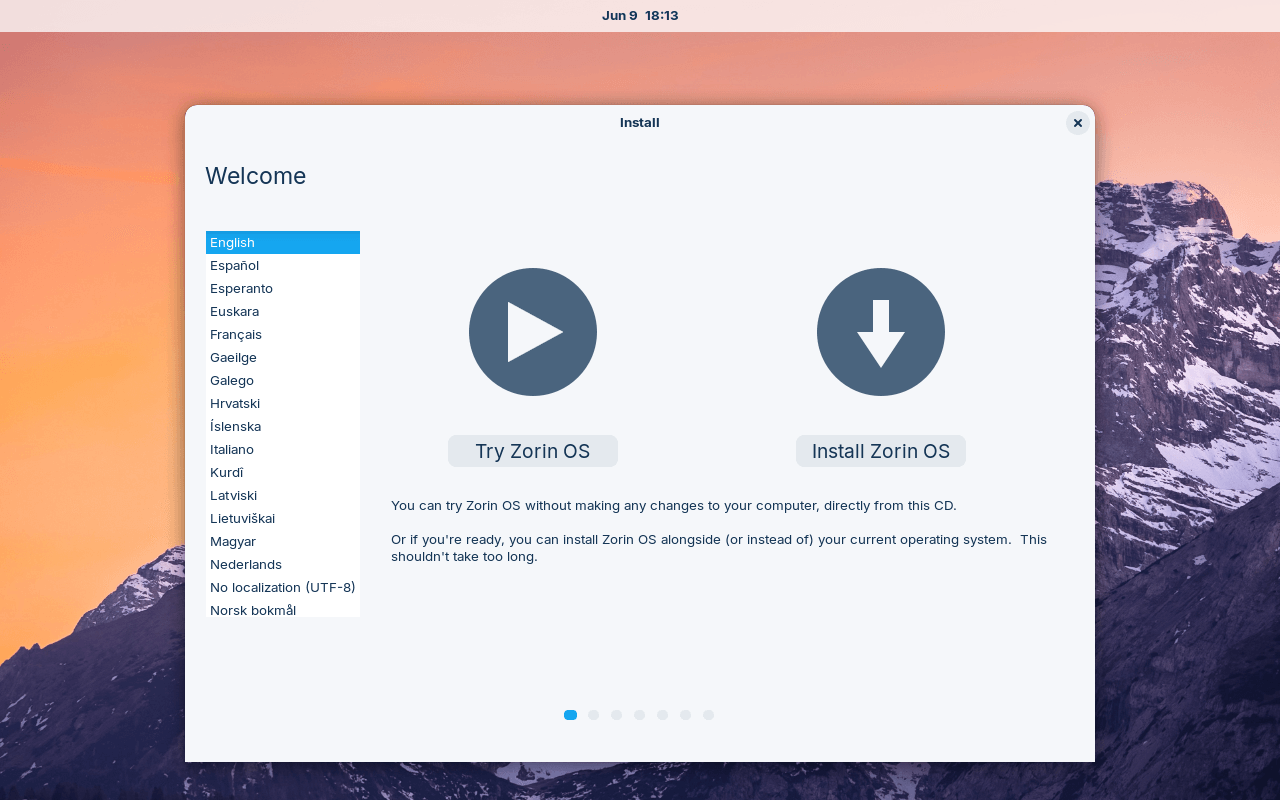
- Click the “Try Zorin OS” option to use the full Zorin OS desktop.

- After reaching the Zorin OS desktop, open the Zorin Menu → System Tools → GParted.
- Your current installation of Zorin OS should be present on a partition with an “ext4” File System. Right-click on it and select “Delete”.

- Press the button at the top of the GParted window to apply these changes.
- After the changes have been applied, close the GParted app.
Install your new copy of Zorin OS
Complete the installation of your new copy of Zorin OS to your computer.
- Double click on the “Install Zorin OS” icon on the desktop.
- Follow the on-screen instructions to start the installation.Is your screen resolution too small?If you can't see the "Continue" and "Back" buttons at the bottom of the installer window, you can move the window by holding down the Super/Logo key while dragging the cursor up from any part of the window.
- When prompted by the installer, please connect to the Internet (if possible). This makes sure all necessary software gets downloaded during the installation process.
- You should reach a step titled “Installation type”.
- If you have another operating system installed on your computer (dual boot). Select the “Install Zorin OS alongside [your other operating system]” option and press “Continue”. This will use the newly-created free space on the drive for your new installation of Zorin OS. If this option didn’t appear for you or your computer has multiple internal hard drives/SSDs, see the “Manual partitioning” instructions below.
- If you have only Zorin OS installed on your computer. Select the “Erase disk and install Zorin OS” option and press “Install Now”. Use this option and click the “Advanced features…” button if you wish to enable disk encryption and LVM.
- Manual partitioning. If your computer has a non-standard storage drive configuration (such as multiple internal hard drives/SSDs), select the “Something else” option and press “Continue”. You can learn how to use this option in this article ›
- Continue following the on-screen instructions to complete the installation.
- After the installation completes, restart the computer to boot into your installed copy of Zorin OS.
Restore your data to the new installation of Zorin OS
You may now restore the data from your previous installation of Zorin OS by either:
- transferring the files you saved to an external drive or cloud storage service onto your new installation.
- restoring a backup using the Backups app.
That’s it! We hope you’ll enjoy using your new copy of Zorin OS 😃️