Install Third-Party GNOME Shell Extensions
Third-party GNOME Shell extensions allow you to make more in-depth modifications to your desktop.
Third-party GNOME Shell Desktop Extensions can cause system issues, including performance and stability problems. If you encounter problems with your system, we recommend that you disable all third-party extensions.
Enable installation of third-party GNOME Shell extensions
If you’ve never installed any third-party GNOME Shell extensions on your system before, please enable support for them by following these steps:
- Open the Zorin Menu and click on “Software”.
- Press the button in the top-left corner of the Software app window to search for “Extension Manager”.
- Click the top search result with the name Extension Manager.
- Press the “Install” button. You may be prompted for your password during the installation process.
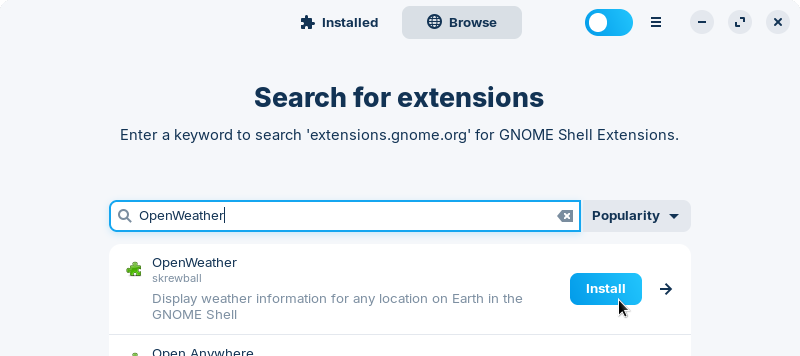
Install third-party GNOME Shell extensions
After installing the Extension Manager app as above, you can browse from a library of community-maintained GNOME Shell extensions.
- Open the Zorin Menu and go to “Accessories” → “Extension Manager”.
- Navigate to the “Browse” tab.
- Search for and install your desired extension.

Manage GNOME Shell extensions
You can use the “Installed” tab in the Extension Manager app to enable extensions, disable, remove, and change thir settings.
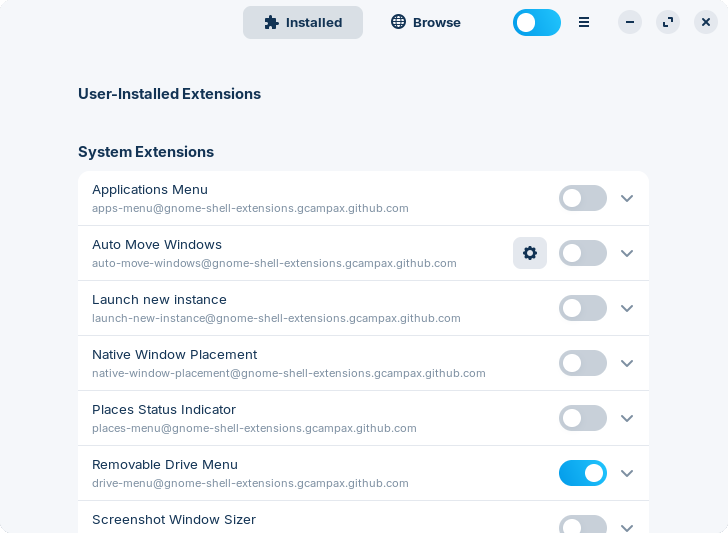
Enable or disable an extension
Press the switch to the right side of the extension you wish to enable or disable to toggle it.
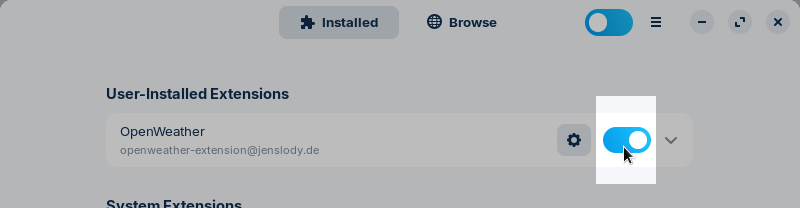
Change settings for an extension
Press the gear button to the right side of the extension you wish to configure.

Afterward, a new window should appear with the available settings for the extension.
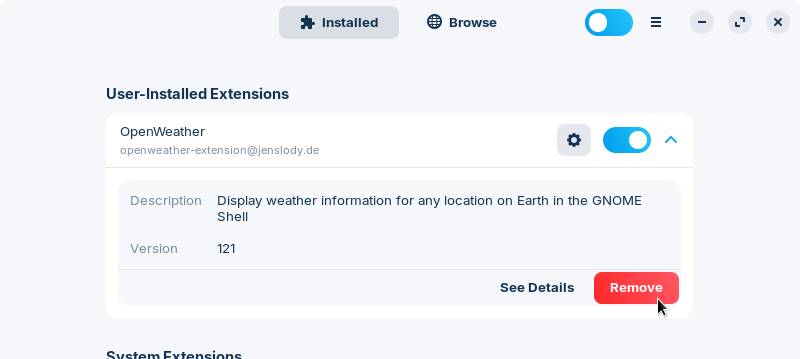
Remove an extension
- Press the button to the right side of the name of the extension you wish to remove.
- Click the red “Remove…” button in the newly expanded section below.

- Accept the prompt to “Remove” the extension.