Unable to Boot From the USB Install Drive
What to do if you're unable to boot from the Zorin OS USB Install Drive to start the installation process.
If the computer doesn’t recognize the USB Install Drive as a bootable device
Firstly, please make sure your computer is configured to boot from the USB flash drive before its internal hard drive/SSD:
- Switch off the computer you want to install Zorin OS onto. Make sure it’s completely powered off, and not in sleep or hibernate mode.
- Plug the Zorin OS USB Install Drive into the computer.
- Switch on the computer. Immediately at start-up, repeatedly press the designated key to open the Boot Device Menu.
- On a PC. This key should be indicated on the screen at start-up or in your computer’s manual. If you’re unsure which key to press, it is usually either Esc, Delete, F2, F12, or another function key.
- On a Mac. Press and hold the ⌥ Option key at start-up. If you’re using a wireless keyboard, you may need to plug in a USB keyboard instead to be able to select the boot device.
- At the Boot Device Menu, use the arrow keys to highlight the option which mentions “USB” or the flash drive manufacturer’s name. Press Enter to boot from the Install Drive.
- On a Mac. Sometimes the Install Drive might be incorrectly identified as “Windows”, which is normal.
If the computer still doesn’t boot the Zorin OS USB Install Drive, please try plugging the USB Install Drive into a different USB port and repeating the above steps.
If this didn’t resolve the issue, please try writing the Zorin OS .iso file to a different USB flash drive. The issue may have been caused by defects with the first USB flash drive.
View how to write the Zorin OS .iso file to a USB flash drive ›
Check the integrity of the downloaded .iso file
If the Zorin OS USB Install Drive still fails to boot, the Zorin OS .iso file may have gotten corrupted while it was downloading.
We recommend that you check the integrity of the downloaded .iso file to verify whether it was corrupted.
View how to check the integrity of the Zorin OS .iso file ›
Disable Secure Boot
Zorin OS should work normally when the Secure Boot feature is enabled on most modern computers (produced after 2011). However, some computers may block the booting of operating systems other than Microsoft Windows by default, including newer computers that have the Microsoft Pluton co-processor built-in.
If your computer still doesn’t recognize the Zorin OS USB Install Drive after following the above instructions, we recommend that you disable the Secure Boot feature:
- Switch off the computer. Make sure it’s completely powered off, and not in sleep or hibernate mode.
- Switch on the computer again. Immediately at start-up, repeatedly press the designated key to open the BIOS/UEFI settings. This key should be indicated on the screen at startup or in your computer’s manual. If you are unsure which key to press, it is usually either F2 Esc, Delete, F12, or another function key.
- On the BIOS/UEFI settings screen, navigate to either the “Boot” or “Security” tab using the ← → keys.
- Make sure that the “Secure Boot” option is disabled. If it’s enabled, scroll down to it using the ↑ ↓ keys and press Enter to disable it.
- Press the indicated key to Save the settings and exit the BIOS/UEFI settings screen (usually the F10 key).
You can re-enable Secure Boot at any time by following the above steps again, but choosing to enable the feature in step 4.
If it is not possible to disable Secure Boot or you are prompted to enroll a “GUID” key when attempting to do so, please follow these steps instead:
- Navigate to the “Security” tab on the BIOS/UEFI settings screen.
- Enable the “Allow Microsoft 3rd Party UEFI CA” option if it is present on your computer.
- Press the indicated key to Save the settings and exit the BIOS/UEFI settings screen (usually the F10 key).
Afterward, you should be able to boot from the Zorin OS USB Install Drive and install Zorin OS normally.
Update your computer’s BIOS/UEFI firmware
Computer manufacturers release updates to their computers' BIOS/UEFI firmware from time to time to improve performance and software compatibility. Updating your computer’s BIOS/UEFI firmware may improve support for Zorin OS.
You should be able to find information about how to do this on your computer model by visiting its manufacturer’s website. If you built the computer yourself, please visit the motherboard manufacturer’s website for information about updating its BIOS/UEFI firmware.
Booting stops at an error message
After selecting the “Try or install Zorin OS” option at the USB Install Drive’s boot menu, you may see an error message that looks like one of the following:
error: /casper/vmlinuz has invalid signature
error: you need to load the kernel first
BusyBox v1.30.1 (Ubuntu 1:1.30.1-4ubuntu6.3) built-in shell (ash)
Enter 'help' for a list of built-in commands.

(initramfs) _
This is most likely caused by either one of two issues:
- Physical defects with your USB Install Drive, which may be the result of wear and tear.
- A corrupted Zorin OS .iso download file.
Firstly, please try writing the Zorin OS .iso file to a different USB flash drive. This is helpful in case the issue was caused by defects with the first USB flash drive.
View how to write the Zorin OS .iso file to a USB flash drive ›
If this didn’t resolve the issue, please check if your downloaded Zorin OS .iso file got corrupted during the download process.
View how to check the integrity of the Zorin OS .iso file ›
Black screen instead of booting
If you see a black screen after selecting the “Try or install Zorin OS” option at the USB Install Drive’s boot menu, the issue is most likely caused by a graphics-related error.
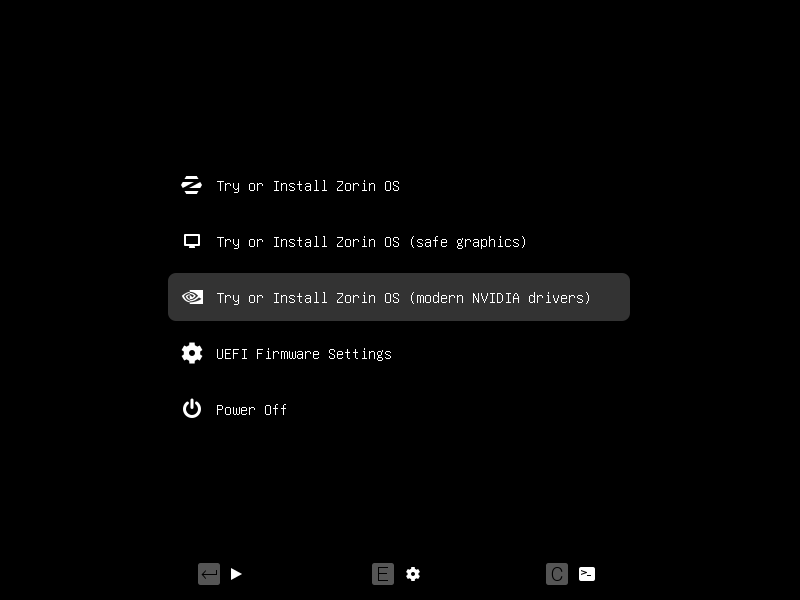
On computers with modern NVIDIA graphics cards
Select the “Try or Install Zorin OS (modern NVIDIA drivers)” option using the ↓ ↑ keys and press Enter to boot and install with the official NVIDIA proprietary graphics drivers. Please note that you may need to first disable your computer’s Secure Boot feature to enable the NVIDIA drivers fully.
This uses a modern version of the NVIDIA proprietary drivers, which only work with newer NVIDIA graphics cards (produced after 2013).
If your computer has an older NVIDIA graphics card and is unable to boot with the standard “Try or install Zorin OS” option, please follow the instructions in the On other computers section below.
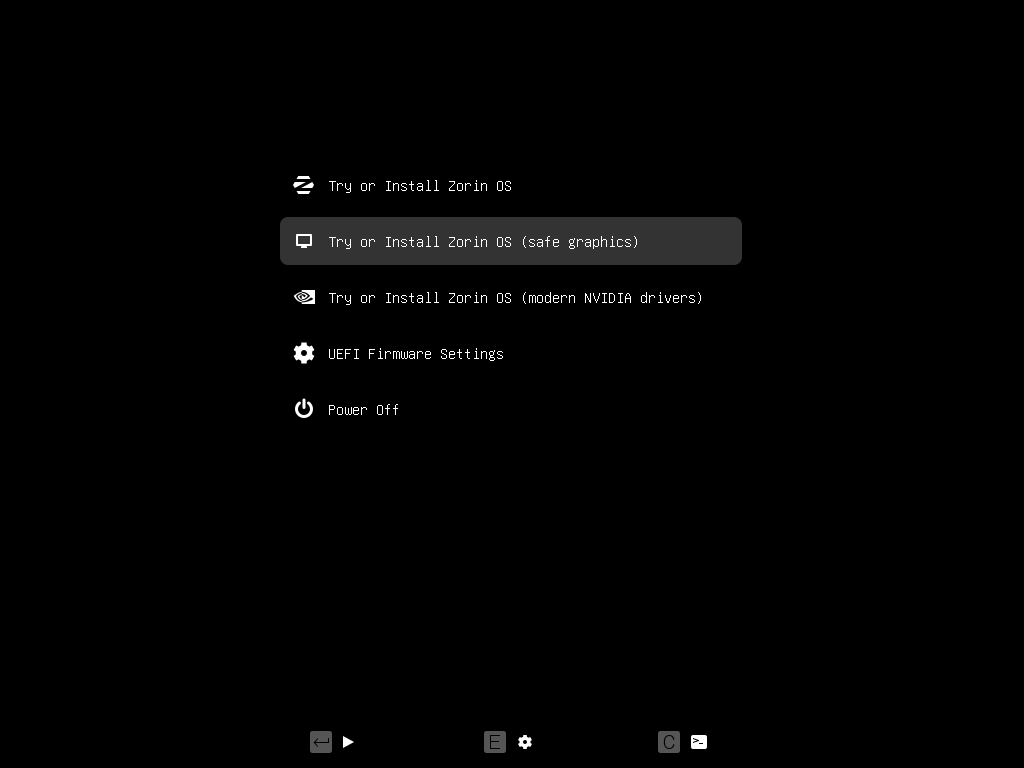
On other computers
Please select the “Try or Install Zorin OS (safe graphics)” option using the ↓ ↑ keys and press Enter to boot.
After installing Zorin OS
If the installation completes normally but you’re still unable to boot your installed copy of Zorin OS afterward, please follow these steps:
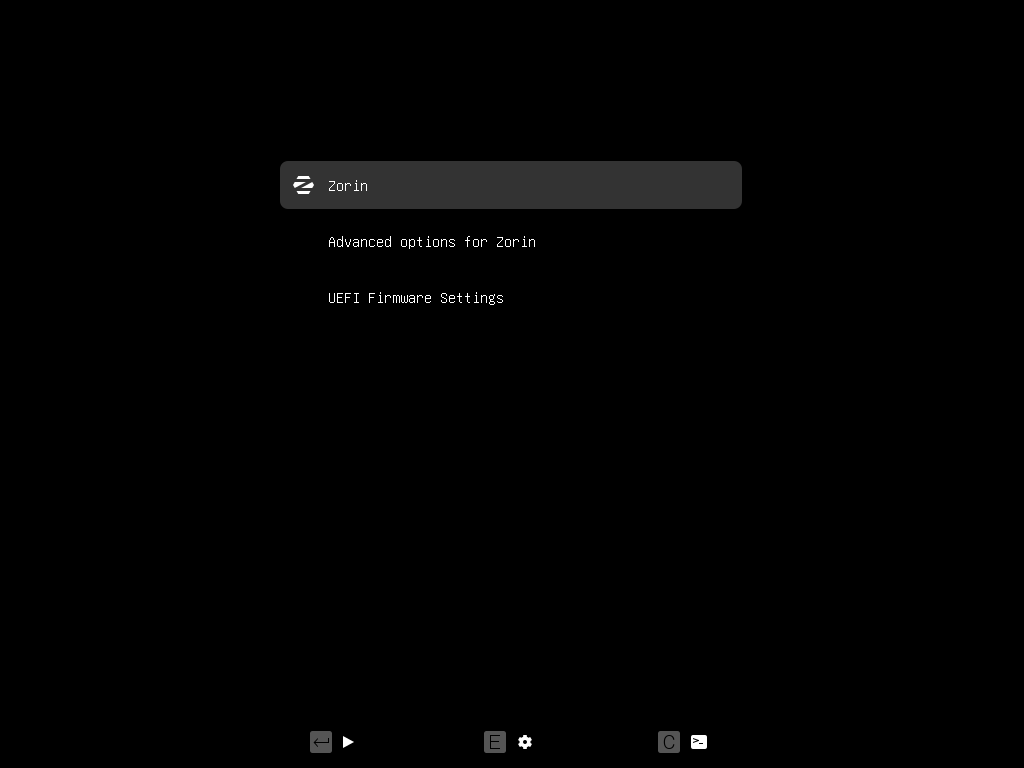
- If you selected the “Erase disk and install Zorin OS” option during the installation process, press either the Esc or Shift key after switching on the computer to access the boot menu.
- At the boot menu, highlight the “Zorin” option. This is usually the first item at the top of the boot menu.

- Press the E key to temporarily edit the boot parameters.
- Use the ↓ ↑ ← → keys to move the cursor right after
roand beforequiet splashon the 2nd last line of text. - Type
nomodesethere so the text reads as follows:
- Press Ctrl + X to boot your installation of Zorin OS.
- After logging into your user account and reaching the desktop, open the Zorin Menu → System Tools → Software Updater.
- Install the latest software updates and resolve this issue permanently.
- After the software updates have finished installing, restart your computer to apply the changes.

If your installed copy of Zorin OS is still unable to boot normally, you may need to set the system to use safe graphics mode permanently. To do so, please follow steps 1-6 above and then follow these instructions:
After logging into your user account and reaching the desktop, open the Zorin Menu → Utilities → Terminal.
Enter the following command into the Terminal:
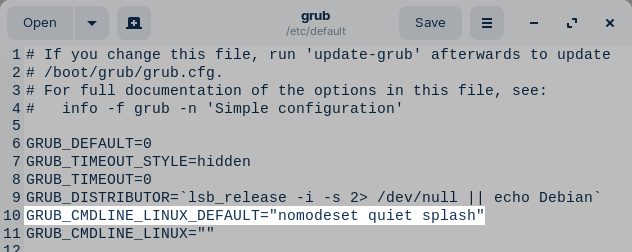
gnome-text-editor admin:///etc/default/grubIn the new Text Editor window, move the cursor to the line that looks like the following:
GRUB_CMDLINE_LINUX_DEFAULT="quiet splash"Add the text
nomodesetbeforequiet splashso this line looks like the following:
Save the file and close the Text Editor window.
Enter the following command into the Terminal:
sudo update-grubRestart your computer to apply the changes.