Printers and Scanners
How to connect and set up your printer and scanner in Zorin OS.
Automatic connection
Most printers will automatically work with your computer. Simply connect it to the same network (if it’s a Wi-Fi printer) or plug it in, and Zorin OS should recognize it.
You’ll be able to select it from any print dialog in the system.
If the printer also comes with a built-in scanner, you should be able to scan a document by opening the Zorin Menu → Office → Document Scanner.
You can check the printer settings, handle maintenance, or print a test page by opening the Zorin Menu → Settings → Printers.
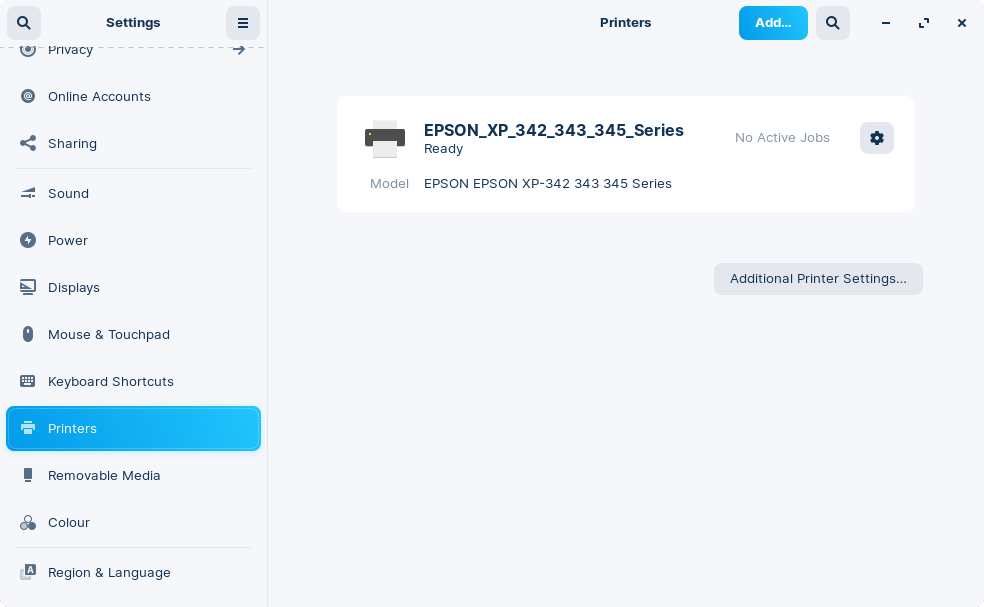
If the printer doesn’t automatically connect
- Open the Zorin Menu → Settings.
- In the left sidebar of the Settings app, navigate to the “Printers” panel.
- Click the “Add a Printer…” button.
- A dialog box will pop up with different options. Wait a few seconds for printers to appear in the Device List.
- Select the correct printer and click “Add”.
If you still weren’t able to add your printer, please try following these steps:
- In the Printers panel in the Settings app, press the “Additional Printer Options…” button.
- Click the “Add” button in the top toolbar.
- Select your printer from the list, or enter the printer’s address on the network.
- If you’re working in an Active Directory or LDAP environment. Select the “Windows Printer via SAMBA” option and enter the printer’s details and authentication credentials.

- If you’re working in an Active Directory or LDAP environment. Select the “Windows Printer via SAMBA” option and enter the printer’s details and authentication credentials.
- Follow the on-screen instructions to complete the setup.

HP printers
Zorin OS comes pre-installed with the official HP printer drivers (HPLIP), so you should be able to set up your HP printer by following the above instructions.
If you aren’t able to get your printer connected automatically or after following the above instructions, please follow these steps:
Open the Zorin Menu → Utilities → Terminal.
Enter the following command:
sudo apt update && sudo apt install hplip-guiOpen the Zorin Menu → System Tools → HPLIP Toolbox.
Open the “Device” menu and select “Setup Device…”
Follow the on-screen instructions to complete the setup.
Epson printers
The newest version of Zorin OS comes pre-installed with the Epson printer drivers (ESC/P-R). You may need to install the latest updates from the Software Updater and restart your computer to get your Epson printer working.
If you still aren’t able to get your printer connected automatically or after following the above instructions, please follow these steps:
- Search for your printer on Epson’s driver download page ›
- Download the latest versions of the “Printer Driver - Epson Printer Utility” and “Scanner Driver - All-in-one package” (if your printer has a built-in scanner).
- Click “Accept” under the Software License Agreement.
- Download the package with the name ending “amd64.deb” or the 64-bit “deb” option.
- After the download completes, open the Files app and navigate to the “Downloads” folder.
- Install the downloaded driver package file.
- If the package file ends with “amd64.deb”:
- Double-click on the .deb file.
- Verify that you trust the source of the app when prompted.
- Press the “Install” button.
- If the package file ends with “.tar.gz”:
Right-click on the file and select “Extract Here”.
Right-click on the newly-extracted folder and select “Open in Terminal”.
Enter the following command:
./install.shFollow the on-screen instructions to complete the setup.
- If the package file ends with “amd64.deb”:
You may need to restart your computer before getting your printer connected.
Brother printers
Search for your printer on Brother’s driver download page ›
Once you find your printer, click its “Downloads” link in the search results.
Select the “Linux” option under “Select OS Family”.
Select the “Linux (deb)” option under “Select OS Version”.
Click the “Driver Install Tool” under the “Utilities” section on that page.
Click “Agree to the EULA and Download”.
After the download completes, open the Files app and navigate to the “Downloads” folder.
Right-click on the “linux-brprinter-installer-….gz” file and select “Extract Here”.
Open the Zorin Menu → Utilities → Terminal.
Enter the following command:
cd DownloadsType
sudo bash linux-brprinter-installerand then press the Tab key to autocomplete the installer file’s full name. Add a space character and then add your printer’s model number at the end. The command should look like this – where “HL-L5000D” is your printer’s model number – before pressing Enter to run it:sudo bash linux-brprinter-installer-2.2.3-1 HL-L5000DFollow the on-screen instructions to complete the setup.
- If you are asked for your “DeviceURI”, you can find that by opening the Zorin Menu → Settings → Printers → “Additional Printer Settings…”, then right-click your printer and select Properties. In the resulting window, you’ll be able to find your Device URI.
You may need to restart your computer before getting your printer connected.
Canon printers
Search for your printer on Canon’s driver download page ›
Under the “Available Drivers” section, open the “Your operating system” drop-down menu and select “Linux (64-bit)”.
Download the newest versions of the “debian Packagearchive” printer and scanner drivers (if your printer has a built-in scanner).
After the download completes, open the Files app and navigate to the “Downloads” folder.
Right-click on the downloaded “.tar.gz” file and select “Extract Here”.
Right-click on the newly-extracted folder and select “Open in Terminal”.
Enter the following command:
./install.shFollow the on-screen instructions to complete the setup.
You may need to restart your computer before getting your printer connected.
Other printers
We would recommend you to consult your printer manufacturer’s website or support service to install their Ubuntu or Linux-compatible drivers.
Alternative drivers
If you weren’t able to get your printer or scanner connected by following the above instructions, the following proprietary drivers may work for you instead:
- TurboPrint (for printers)
- VueScan (for scanners)