Manually Partition the Drive to Install Zorin OS
How to use the “Something else” option to manually partition your computer's hard drive or SSD.
View how to install Zorin OS ›
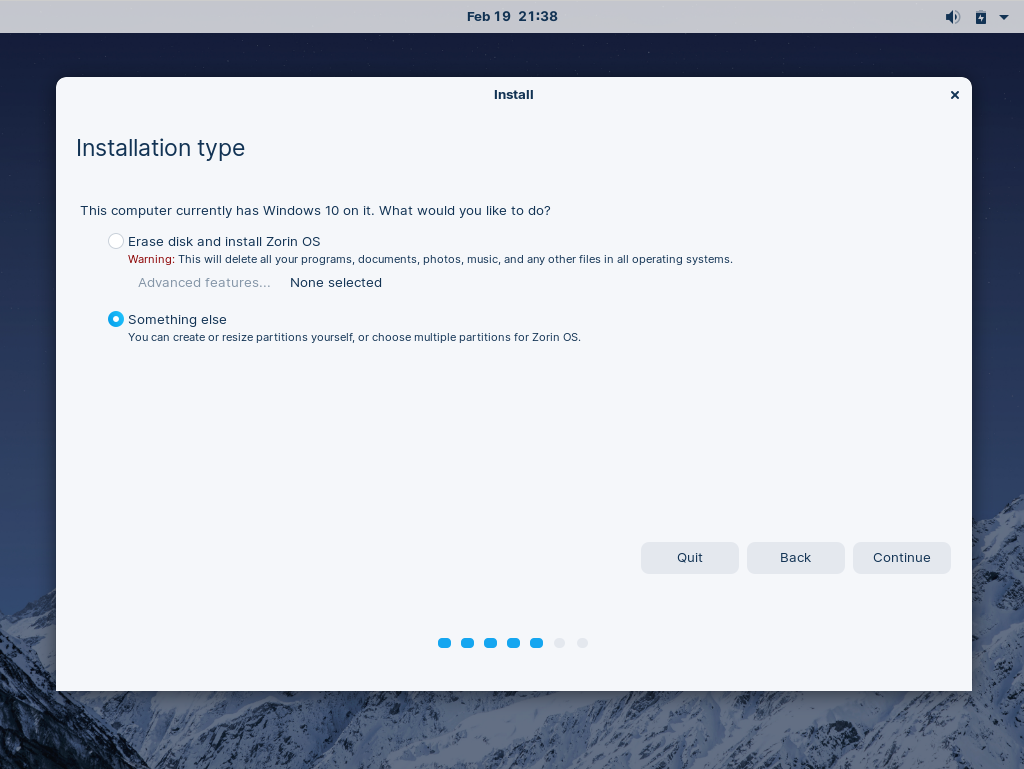
When you reach the “Installation type” stage of the installer, select the “Something else” option and press “Continue”.

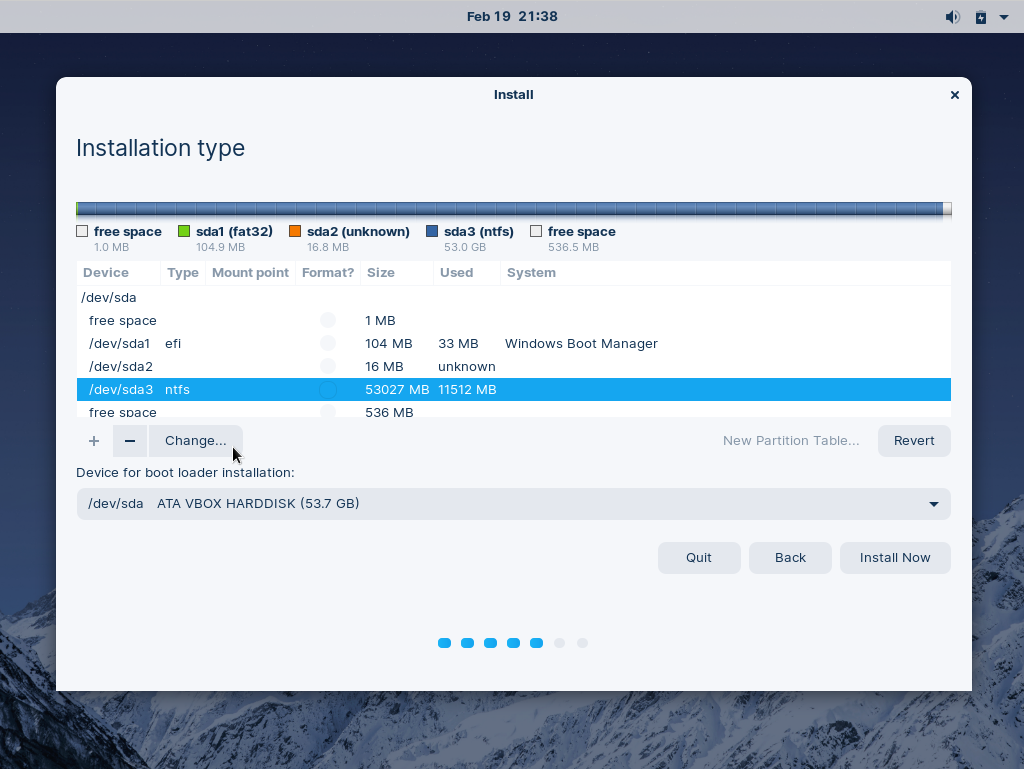
If you have another operating system installed on your computer, highlight its main partition in the list. Then press the “Change…” button below the list.
- For Windows, this is usually the largest partition with the type “ntfs”.

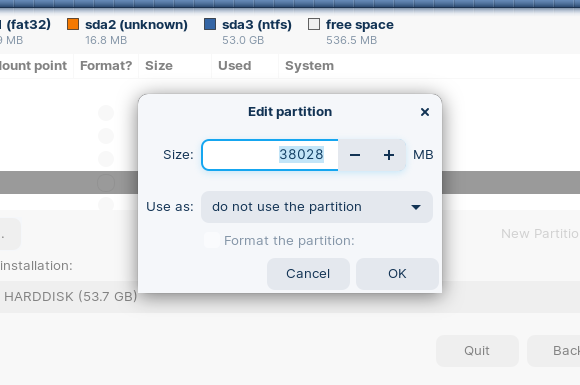
Reduce the “Size” of the partition you selected in step 2 to free enough space for Zorin OS. To find out the minimum storage space you must allocate for your edition of Zorin OS, please view the System Requirements ›

Keep the “Use as” setting at “do not use the partition” in the dialog and press “OK”.
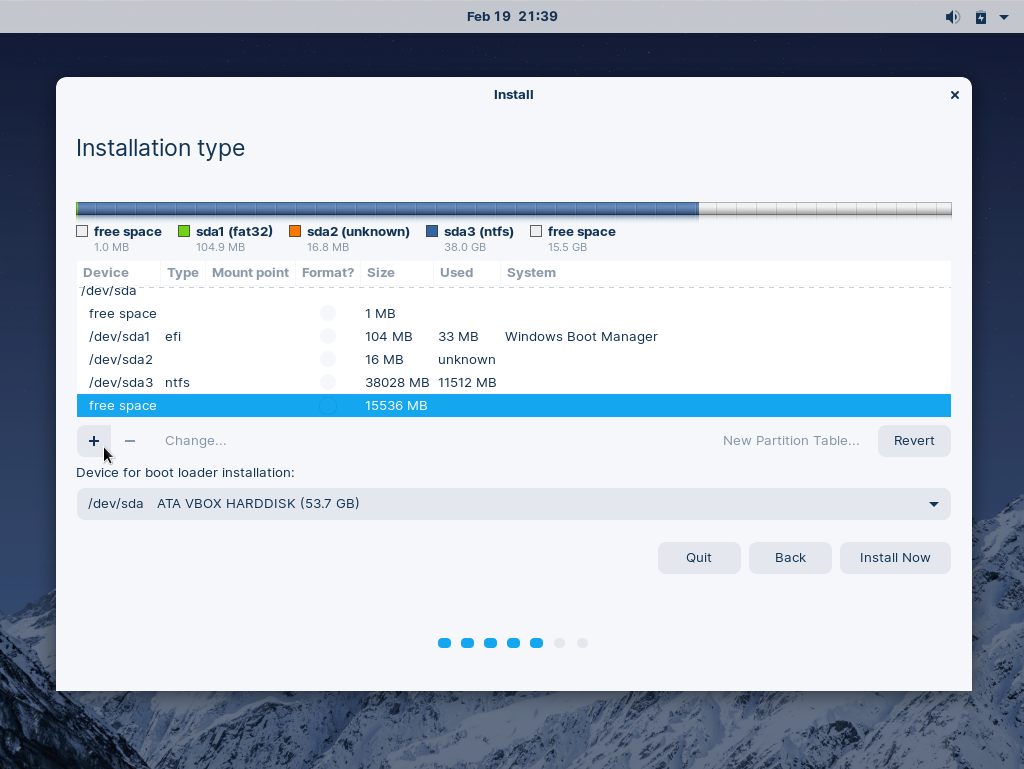
Select the newly-created free space in the list and press the + button.

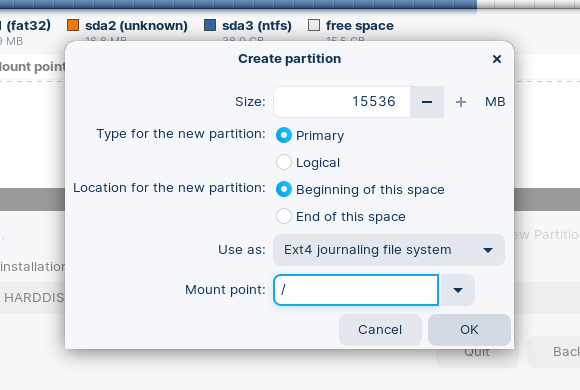
To create the Zorin OS partition, select the following settings in the dialog and press “OK”:
- Size: all remaining free space
- Type for the new partition: Primary
- Location for the new partition: Beginning
- Use as: Ext4 journaling file system
- Mount point: /

On most computers (with one hard drive/SSD), the default setting for the “Device for boot loader installation” option should be correct. You shouldn’t need to change this setting.
- If your computer has multiple hard drives/SSDs. Open the “Device for boot loader installation” drop-down menu and select the device where you created the new Zorin OS partition in step 5. Do not select a specific partition in the drop-down menu (with a drive identifier ending in a number, like “/dev/sda3”).

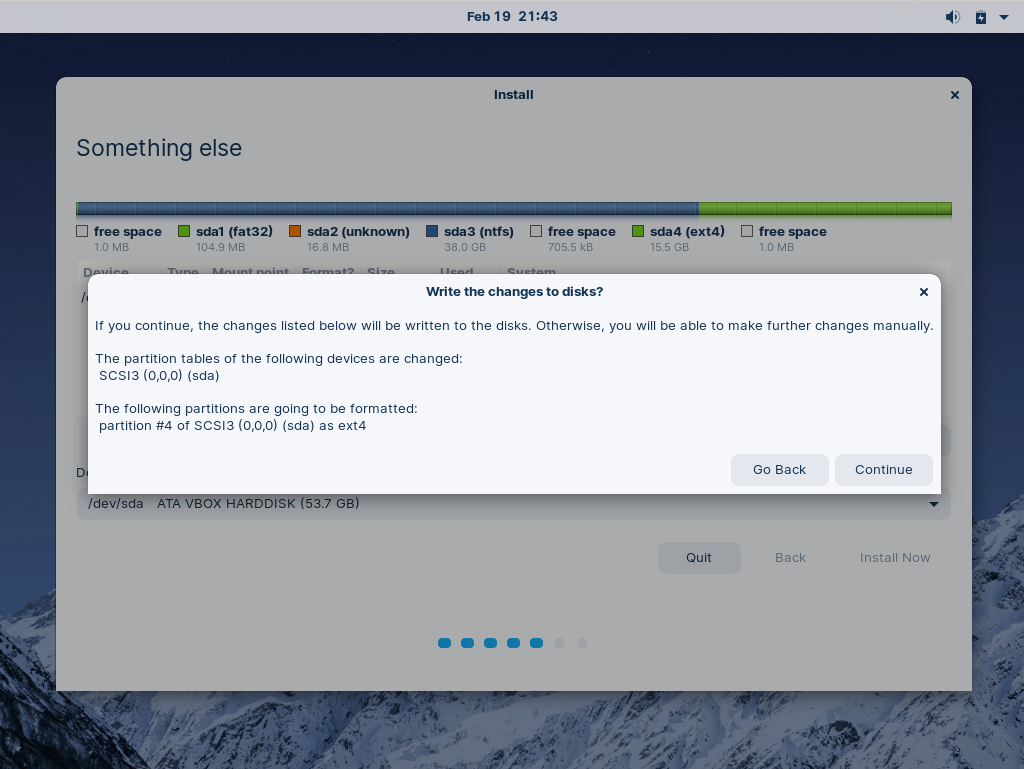
Press the “Install Now” button at the bottom of the window.
Accept the “Write the changes to disks?” prompt to proceed.

Follow the on-screen instructions to complete the installation.