Set Up Wi-Fi
Connect to a Wi-Fi network and troubleshoot issues with your computer's Wi-Fi connection.
On this page
Connect to a Wi-Fi network
- Click on the indicator icons on the right side of the panel to open the indicators menu.
- Click the arrow beside the “Wi-Fi” button to expand the available networks menu.

- Choose your Wi-Fi network from the list to connect to it. You may need to enter the Wi-Fi network’s password to connect.
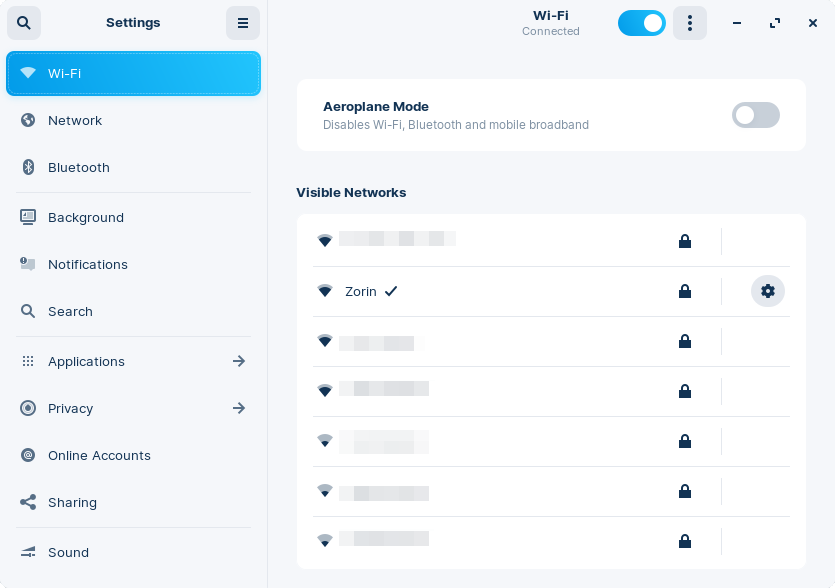
Another way to connect to a Wi-Fi network is to open the Zorin Menu → Settings → Wi-Fi and select your network from the list.

If you can’t connect to a Wi-Fi network
If Zorin OS doesn’t recognize your computer’s Wi-Fi hardware, the Wi-Fi panel may not appear in the Settings app.
Toggle your computer’s Wi-Fi switch
If your computer has built-in Wi-Fi hardware, its chip may have been disabled at the hardware or firmware level. You should be able to re-enable it by following one of these steps:
- Press the designated keyboard shortcut to toggle Wi-Fi. On most laptops, this is usually Fn + a function key indicated with a Wi-Fi icon.
- Find a physical Wi-Fi switch on your computer and toggle it on.
If neither of these solutions applies to your computer’s hardware, try re-enabling Wi-Fi at the firmware level by following these steps:
- Switch off the computer. Make sure it’s completely powered off, and not in sleep or hibernate mode.
- Switch on the computer. Immediately at start-up, repeatedly press the designated key to open the BIOS/UEFI settings. This key should be indicated on the screen at startup or in your computer’s manual. If you are unsure which key to press, it is usually either Esc, Delete, F2, F12, or another function key.
- Find an option in the BIOS/UEFI settings screen that mentions “Wi-Fi”, “Wireless Network Adapter”, “WLAN Device” or something similar, and make sure that it’s enabled. The name and location of this setting will depend on the make and model of your computer.TipYou can navigate through the BIOS/UEFI settings screen using the ↓ ↑ ← → keys and select a setting by pressing Enter.
- If you changed a setting in step 3, press the indicated key to Save the settings and exit the BIOS/UEFI settings screen (usually the F10 key).
Your computer should be able to connect to Wi-Fi the next time you turn on your computer.
Install the latest software updates
Oftentimes, newer hardware drivers or other system-level software are already available to add support for new Wi-Fi hardware.
- Connect your computer to the Internet by doing one of the following:
- Plug in an Ethernet cable from your Internet router into your computer’s Ethernet port.
- Tether your phone over USB to share its Internet connection with your computer. View how to do this ›
- Open the Zorin Menu → System Tools → Software Updater
- Select to install the latest updates.
- Restart your computer to apply the changes.
Activate available Wi-Fi drivers
You may be able to install additional drivers to get some Wi-Fi hardware working. Because some of these drivers are under proprietary licenses, they can’t be pre-installed in Zorin OS for all users.
- Connect your computer to the Internet by doing one of the following:
- Plug in an Ethernet cable from your Internet router into your computer’s Ethernet port.
- Tether your phone over USB to share its Internet connection with your computer. View how to do this ›
- Open the Zorin Menu → System Tools → Software Updater.
- After the Software Updater has finished checking for updates, click on “Settings…”.
- Navigate to the “Additional Drivers” tab.
- After a moment, you should see a list of drivers available for your computer. Select the radio button beside any option that mentions “Wireless”, “Wi-Fi”, “WLAN”, or “Broadcom”.
- Click “Apply Changes”. This will start downloading and installing the drivers for your computer’s Wifi hardware.
- After the installation completes, restart your computer to apply the changes.
Disable Secure Boot
Your computer’s Secure Boot feature might be blocking the system from loading drivers for the Wi-Fi hardware.
- Switch off the computer. Make sure it’s completely powered off, and not in sleep or hibernate mode.
- Switch on the computer. Immediately upon start-up, repeatedly press the designated key to open the BIOS/UEFI settings. This key should be indicated on the screen at start-up or in your computer’s manual. If you are unsure which key to press, it is usually either Esc, Delete, F2, F12, or another function key.
- At the BIOS/UEFI settings screen, navigate to the “Boot” or “Security” tab using the ← → keys.
- Make sure that the “Secure Boot” option is disabled. If it’s enabled, scroll down to it using the ↑ ↓ keys and press Enter to set it.
- Press the indicated key to Save the settings and exit the BIOS/UEFI settings screen (usually the F10 key).
Your computer should be able to connect to Wi-Fi the next time you turn on your computer.
