Activate NVIDIA Graphics Card
How to install the official proprietary NVIDIA drivers in Zorin OS.
On this page
If your computer has an NVIDIA graphics card, you will need to use the official proprietary driver software to take full advantage of its features in Zorin OS.
If you haven’t installed Zorin OS yet
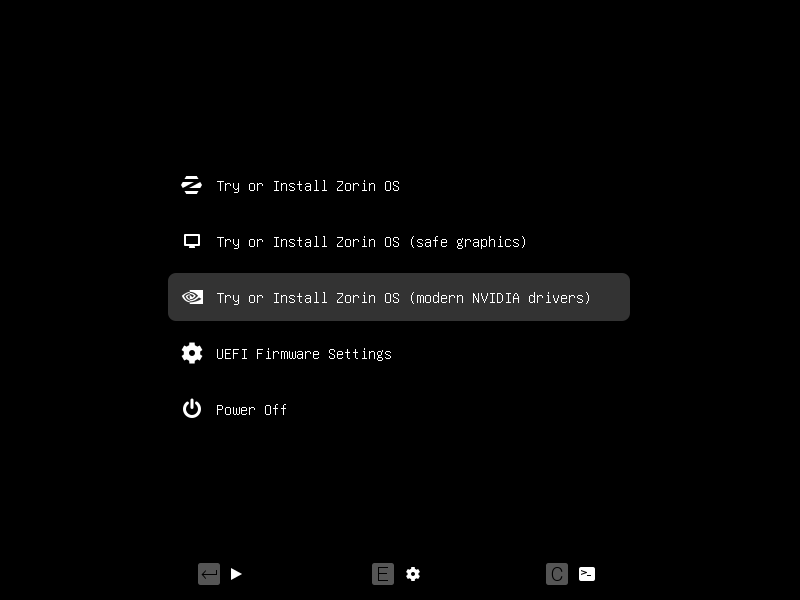
When booting your Zorin OS USB Install Drive, you can use the ↓ ↑ keys to select the “Try or install Zorin OS (modern NVIDIA drivers)” option.

Start the installation process for Zorin OS normally.
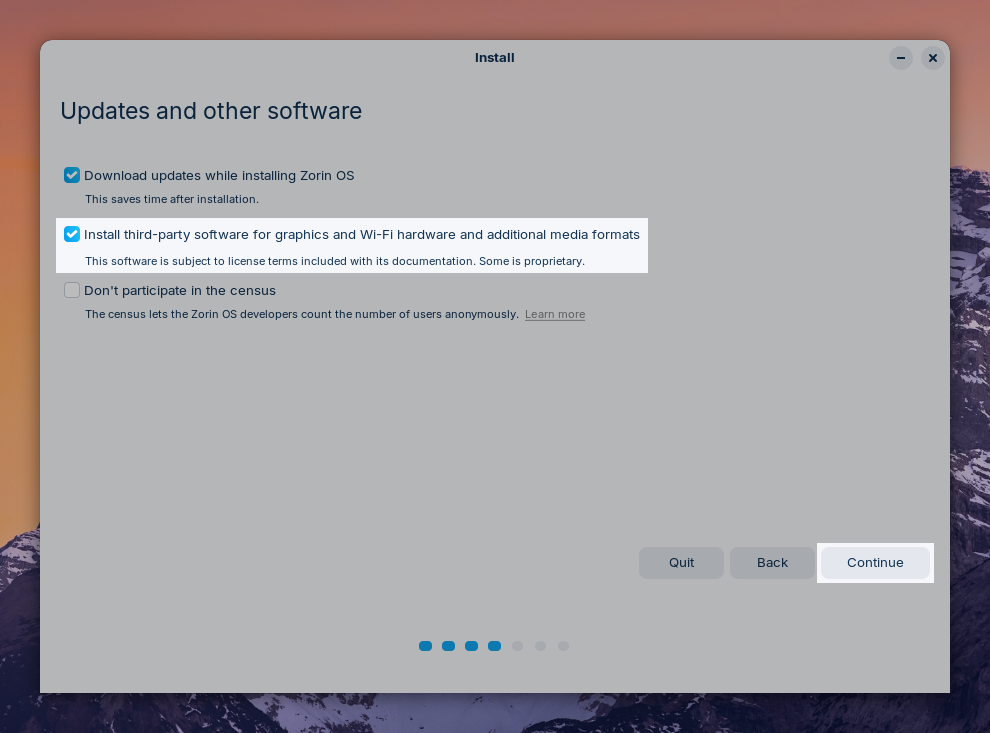
When you reach the “Updates and other software” stage of the installer, please make sure that the “Install third-party software for graphics and Wi-Fi hardware and additional media formats” option is enabled.
You can then press “Continue” and follow the on-screen instructions to complete the installation.

After the installation completes, you may need to disable your computer’s Secure Boot feature to enable the NVIDIA drivers fully.
If you’ve already installed Zorin OS
If you’ve already installed Zorin OS to your computer without selecting to use the modern NVIDIA drivers as in the above instructions, you will need to install the correct version of the NVIDIA drivers using the built-in “Additional Drivers” app.
- Make sure that your computer is connected to the Internet.
- Open the Zorin Menu → System Tools → Software Updater.
- After the Software Updater has finished checking for updates, click on “Settings…”.
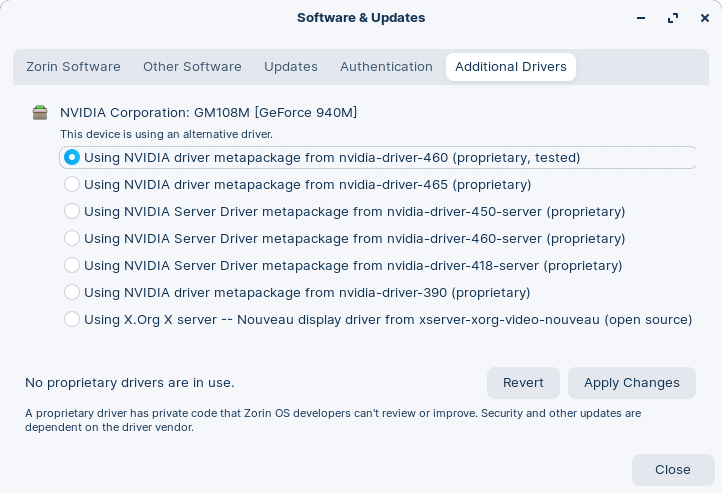
- Navigate to the “Additional Drivers” tab.
- After a moment, you should see a list of graphics drivers available for your computer. Select the radio button beside the newest or recommended version of the standard “NVIDIA driver” (not a “Server” version).TipFor better compatibility and hardware support, choose a "(proprietary)" driver instead of an option ending with "-open".

- Click “Apply Changes”. This will start downloading and installing the NVIDIA proprietary drivers.
- After the installation completes, restart your computer to apply the changes.
The NVIDIA drivers should now be installed and activated.
Verify whether the NVIDIA drivers are activated
You can verify that the drivers are installed and working correctly by following these steps:
- Open the Zorin Menu → Settings.
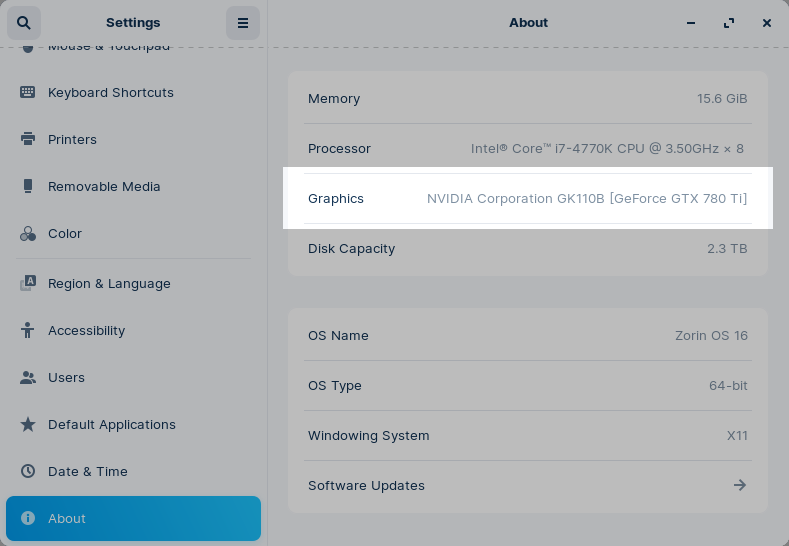
- Navigate to the “About” panel, which should be at the bottom of the left sidebar menu.
- Check if “NVIDIA” is mentioned in the “Graphics” list item.

If the NVIDIA graphics drivers are still not activated
Switch to Zorin Desktop on Xorg
- Log out of your user account or restart your computer.
- At the login screen, please select your username.
- Click on the gear icon in the bottom-right corner of the screen to open the desktop environment menu.
- Select the “Zorin Desktop on Xorg” option, not “Zorin Desktop” or “Zorin Desktop on Wayland”.
- Afterward, log in normally again.
Disable Secure Boot
Your computer’s Secure Boot feature may be blocking the system from loading the NVIDIA drivers.
- Power off your computer and power it on again.
- Immediately upon start-up, repeatedly press the designated key to open the BIOS/UEFI settings. This key should be indicated on the screen at start-up or in your computer’s manual. If you are unsure which key to press, it is usually either Esc, Delete, F2, F12, or another function key.
- At the BIOS/UEFI settings screen, navigate to the “Boot” or “Security” tab using the ← → keys.
- Make sure that the “Secure Boot” option is disabled. If it’s enabled, scroll down to it using the ↑ ↓ keys and press Enter to set it.
- Press the indicated key to Save the settings and exit the BIOS/UEFI settings screen (usually the F10 key).

